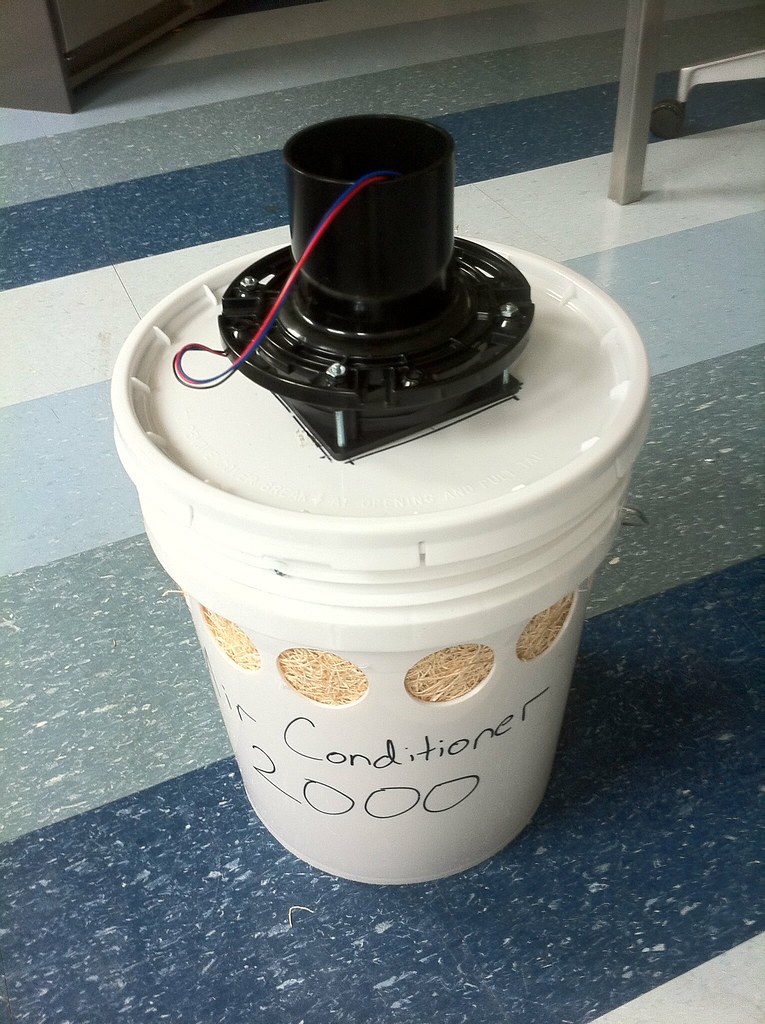
Introduction to the Art of DIY Swamp Coolers:
Whether you’re faced with a sweltering summer or a budget crunch that doesn’t favor a traditional air conditioning system, a DIY swamp cooler could be your perfect savior. It’s not just cost-effective, but also an incredibly fulfilling project. Building a swamp cooler on your own doesn’t require a degree in rocket science, but some patience, a little bit of handyman skills, and of course, the right parts. The good news is, everything you need can be found conveniently on Amazon. The satisfaction of sipping a cold drink next to your homemade cooler is truly unmatched!
The Heart of Your DIY Swamp Cooler: The Fan
The first piece of your swamp cooler puzzle is the fan. The purpose of the fan in a DIY swamp cooler is to blow cool, moist air throughout the room, replacing the stagnant, hot air. When choosing your fan, make sure to consider its power, size, and noise level. A 5-inch, 3-speed, high velocity fan should do the trick. Remember, a fan with adjustable speed options can help customize your cooling experience.
Embracing the Moisture: The Cooling Pads
The next key element in your DIY swamp cooler are the cooling pads. They function by absorbing water and allowing it to evaporate, thus creating a cooling effect. Aspen cooling pads are a popular choice due to their efficiency and affordability. When choosing cooling pads, consider their size relative to your fan. They should be large enough to cover the fan’s intake area completely, providing maximum cooling efficiency.
Water: The Essential Element
You can’t have a swamp cooler without water! For this, you’ll need a small water pump to keep the water circulating over the cooling pads. Look for a submersible pump, typically used in aquariums or fountains. These pumps are compact, reliable, and perfect for this job. Also, you’ll need a water reservoir, and a simple plastic container can be utilized here. It should be large enough to hold an adequate amount of water for the cooling pads to stay moist.
Creating the Framework: The Cooler Body
The body of your DIY swamp cooler can be as simple or as complex as you want. Some DIY enthusiasts use a five-gallon bucket, while others might repurpose an old cooler. Whatever you choose, ensure it’s large enough to accommodate your fan, cooling pads, and water system. Remember to design your cooler body for easy access to all components for maintenance and refilling the water reservoir.
Finishing Touches: Extras for Your DIY Swamp Cooler
To finish your DIY swamp cooler, consider adding a few extra features. A float valve can be used to automate the refilling process of the water reservoir. Also, casters or wheels at the bottom of your cooler can make it easily movable. You may even wish to add a solar panel system, making your swamp cooler completely off-grid and environmentally friendly.
Embrace the spirit of DIY and start building your own swamp cooler today. With a well-crafted Amazon shopping list, you’ll be well on your way to beating the heat in no time!
DIY Swamp Cooler Assembly Guide
Step 1: Prep Your Cooler Body
Take your selected cooler body and make sure it’s clean and ready for your project. If you’re using a bucket or an old cooler, make sure it’s free of any residues that could affect the performance of your DIY swamp cooler. Cut a hole on top that’s the same diameter as your fan.
Step 2: Install the Fan
Place your fan on top of the cooler body, aligning it with the hole you cut in the previous step. The air should blow into the cooler. Secure it in place using screws or heavy-duty zip ties.
Step 3: Prepare the Cooling Pads
Soak your cooling pads in water until they’re thoroughly wet. Afterward, cut them to match the size of the openings of your cooler body. If your cooler has multiple sides, make sure you have enough pads to cover each one.
Step 4: Install the Cooling Pads
Attach the wet cooling pads to the inside of the cooler body, covering the ventilation openings. You can use clips, glue, or another form of adhesive to keep them secure. Ensure that the air drawn by the fan will pass through these pads.
Step 5: Set Up the Water Pump
Place your water pump at the bottom of the cooler body, making sure it’s fully submerged in the water reservoir. Connect a plastic tube from the pump to the top of the cooling pads, arranging it so that water will drip down evenly across the pads when the pump is on.
Step 6: Connect the Power
Connect the fan and the water pump to a power source. If you’re using a solar panel system, make sure it’s placed in a sunny spot and properly wired to your devices. Always be cautious when working with electricity, and consider using a ground fault circuit interrupter (GFCI) for safety.
Step 7: Finishing Touches
If you’re adding extras, now’s the time. Install a float valve to maintain the water level in your reservoir. Attach wheels for mobility. Make sure everything is secure and working as expected.
Step 8: Test Your DIY Swamp Cooler
Fill your water reservoir, plug in the power, and give your swamp cooler a test run. The fan should draw air in, pass it over the moist cooling pads, and emit a refreshing cool breeze. Enjoy your DIY swamp cooler!
Remember, safety first! Always use tools and electrical components properly. Regularly check and maintain your swamp cooler for optimal performance. Happy cooling!


